Showing posts with label plants. Show all posts

How to Lure Native Birds to Your Garden: Expert Tips from Australia

Birds play a crucial role in the environment, and you can invite over 700 indigenous species to your garden.

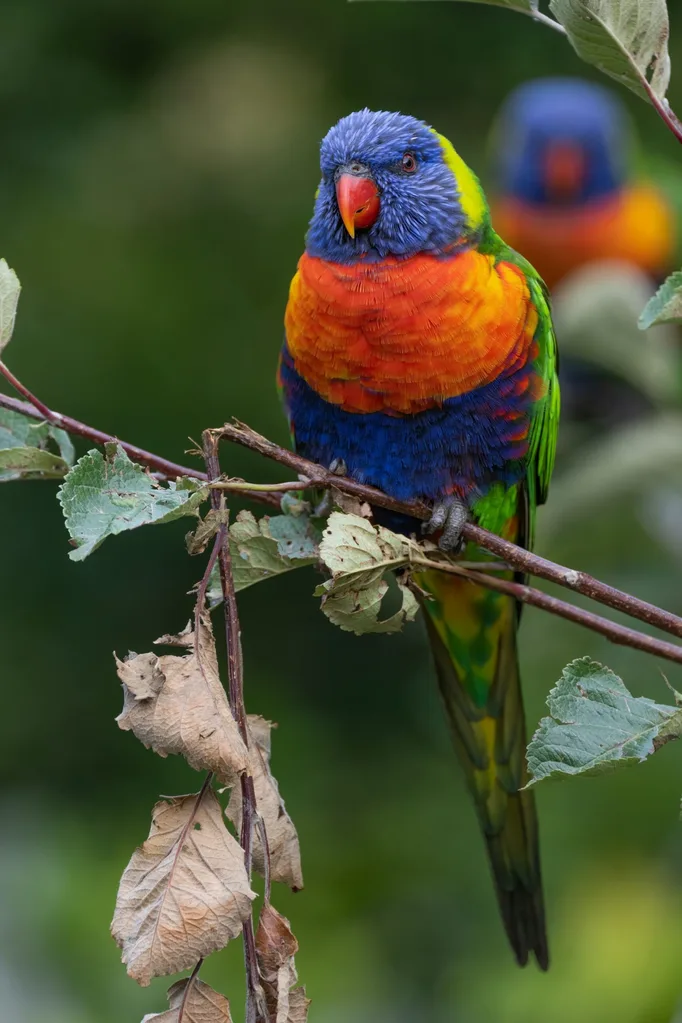
It likely won’t be surprising that indigenous birds such as galahs, rainbow lorikeets, and cockatoos are drawn to Australian native flowers , and in their view, the more nectar, the merrier. Choose plants that bear flower filled with nectar, and you can be almost certain of attracting our local winged companions.

To assist you in turning your garden into a thriving sanctuary for birds, consider these key bird-attraction strategies along with the best plants to cultivate in Australian gardens.

Ways to lure indigenous birds into your backyard

  • Plant natives: Indigenous flora will draw local avian species. These birds tend to be particularly drawn towards blooms in shades of red and yellow. Cultivate an assortment of vegetation that blossoms during various seasons throughout the year.
  • Shelter: Strive for a composition featuring multiple levels of vegetation with varying heights. Cultivate clusters of short shrubs to create a thick lower layer where tiny birds can build their nests or find refuge.

  • Water: A minimalistic approach involves using a shallow container free from threats, provided the water remains fresh and clean. For ponds, incorporating elements like stones, twigs, or gently sloping sides can offer spots for resting.

  • Food: Based on their type, birds may consume nectar, seeds, and/or berries along with insects. To draw insects and lizards into your area, create suitable environments like piles of wood, stones, and organic ground coverings. It’s acceptable to feed birds seeds, fruits with peels, vegetables, or combined cereals provided dependency doesn't form. Avoid using honey since it might transmit illnesses among bees.

  • Pets: Prevent cats from entering your garden.

Which indigenous flora attracts birds?

1. Bottlebrushes

Our local Callistemon species boast vibrant, nectar-rich blossoms that draw in lorikeets, rosellas, honeyeaters, along with numerous insects that serve as food for smaller avian creatures. Their seeds also act as sustenance for rosellas and various other parrot types. Varieties like 'Kings Park Special', 'Endeavour' and 'Harkness' make excellent petite trees featuring crimson hues; however, you'll find options available in shades of pink, mauve, yellow, and white too. Dense shrub choices encompass cultivars such as 'Captain Cook', 'Firebrand', and 'Matthew Flinders'. Interestingly enough, bottlebrush plants exhibit greater tolerance towards more saturated soil conditions compared to most indigenous Australian flora.

2. Banksias

Banksias provide both refuge and copious nectar within their densely packed flower spikes, typically during the crucial autumn-winter season. These plants also draw insects and supply seeds that appeal to bigger birds like cockatoos. Among the loveliest varieties are some spectacular species, such as B. grandis and B. pilostylis are indigenous to Western Australia and may not be as suitable for the eastern states. In those areas, good options include 'Giant Candles', coastal banksia (B. integrifolia), and heath banksia (B. ericifolia). B. ericifolia ).

3. Grasses

Small birds like finches and wrens search for typical garden insects in our outdoor spaces but generally remain close to the ground, hopping between plants. These little creatures enjoy tussocky grasses both for their seeds and for protection. Consider planting native varieties such as kangaroo grass. Themeda triandra ), tussock grass ( Poa labillardieri ), meadow ricegrass (Microlaena stipoides) and wallaby grass ( Austrodanthonia spp ). Dots gather among the low-lying shrubs in the garden, ensuring a unbroken secure area where small birds can safely search for food.

4. Grevilleas

Grevilleas They vary from low-growing groundcovers to towering trees, though most tend to be compact shrubs of moderate size. The big-blossomed hybrid varieties flower throughout the year, luring sizable honeyeaters which are entertaining to observe yet may deter tiny birds. Notable standouts among these plants encompass 'Superb', 'Peaches and Cream', 'Moonlight' along with 'Honey Gem'. These come in an array of hues including yellows, oranges, pinks, creams, and reds. For those seeking options more appealing to petite avian visitors, dwarf types bearing diminutive blooms would be preferable. Consider trying G. rosmarinifolia 'Firecracker', 'Pink Midget', and 'Lady O'.

Exotic flora species that draw avian life

1. Camellias

Camellias are among numerous exotic flora that consistently attract birdlife. The sasanqua variety blooms from late summer through autumn, succeeded by the japonica species. thrive from the cold of winter to the warmth of spring This indicates an ample supply of nectar for nine months out of the year. The thick canopy provides protection and security. Camellias are important as they thrive in shaded areas; many native plants require more sunlight to blossom effectively.

What methods do you use for identifying birds?

A great reference for recognizing both indigenous and migratory avian species is "The Slater Field Guide to Australian Birds" by Peter, Pat, and Raoul Slater, or similarly helpful is "Photographic Field Guide: Birds of Australia" by Jim Flegg. Otherwise, reach out to your nearby ornithological group or explore their resources. Birds in Backyards And utilize the bird identifier.

The post Ways to lure indigenous birds into your garden appeared first on Homes To Love .

How to Grow Luscious Passionfruit in Your Australian Garden


categories: , , ,

Passionfruit vines are fantastic plants to cultivate in any garden. They not only yield incredibly delicious fruits but also add beauty with their lush foliage. delicious fruit Additionally, their vines can act as an attractive cover-up for ugly walls and fences.

Here’s how you can cultivate passionfruit vines in your own backyard along with crucial tips for maintaining their health.

Passionfruit varieties

There are over 50 varieties of passionfruit Varieties of vines include Banana, Hawaiian, Norfolk Island, Yellow Giant, Panama Gold, Panama Red, and Nellie Kelly.

Different cultivars vary when it comes to their ability to tolerate cold, so make sure to read the label carefully prior to purchasing. You'll often see the Nellie Kelly variety in Australian gardens; this particular cultivar has been developed to endure lower temperatures. resist pests and diseases In more tropical areas, Panama hats are commonly worn. Thanks to their ability to withstand moist conditions.

Ways to Look After Passionfruit Plants

Climate

Passionfruit Vines are adaptable yet thrive most effectively in subtropical and temperate environments, particularly with shelter from frost during their early stages.

Aspect

Place your passionfruit vine in direct sunlight and shield it from strong gusts. For regions with cooler temperatures, select an area near a northern-exposed wall to take advantage of the warmth radiating from it.

Passionfruit vines develop vast root networks; thus, select an area with ample room for planting, clear of weeds, rivaling vegetation, and lawn. Additionally, they may extend over a span of up to 10 square meters, hence opt for or construct a support system capable of handling their growth.

Passionfruit vines can also be taught to trail alongside your fence, whether it’s made of wood or wire trellis , or above an arbor. Simply attach some wires or mesh for its tendrils to cling to.

Soil

The ideal soil for passionfruit vines should be abundant in organic material, have good drainage, and maintain a pH level between 5.5 and 6.5.

At what time should you sow your passionfruit?

The ideal season for planting a passionfruit vine is spring. Prior to planting, get your soil ready by mixing in compost and chicken manure across an area measuring about one to two meters wide. Excavate a hole that is double the width and depth of the root ball, carefully loosen the roots, place the vine into the hole, and then thoroughly water it. Mulch Around the bottom with sugarcane, bark chips, or pea straw, just make sure not to pile it up near the stem.

Passionfruit plants can similarly thrive when cultivated in big containers provided they're equipped with proper supporting frameworks.

Watering

Young passionfruit vines need consistent hydration, particularly during their blooming and fruit-bearing stages. Aim to water them thoroughly a few times each week, adjusting based on prevailing weather and climatic factors.

Make sure to distribute your watering across the whole root system instead of solely focusing on the area near the vine's stem.

Fertilising

Water your passionfruit vine with diluted citrus fertilizer or apply chicken manure two times annually, during spring and fall. Make sure you spread the fertiliser Throughout the whole root system. Steer clear of excessive feeding or applying fertilizers with high levels of nitrogen, as this can promote foliage development instead of blossoms and fruit.

The optimal time for picking passionfruit

Blooms typically emerge in late spring prior to fruit development in early summer. You should see your initial fruits showing up roughly six to eight months post-planting; however, be patient as this process may extend up to about 18 months. passionfruit vine to fruit.

To ensure passionfruit is ripe, allow it to fully mature on the vine until it falls off naturally. Alternatively, you can harvest it once the fruit has achieved full color and detaches from the vine effortlessly.

Pruning

The best time to prune A passionfruit vine should be pruned in late winter or early spring. Reducing the vine by approximately one-third will stimulate robust growth and increase fruit production.

Propagation

The passionfruit vine may be propagated from cuttings However, it is best propagated from seeds.

How to grow passionfruit

  • Step 1: Select an area in your garden that receives ample sunlight for about six hours daily and is shielded from strong gusts of wind.
  • Step 2: As passionfruit vines require support, position your plant alongside a trellis, close to a fence, wall, or pergola. Ensure it has about 2 meters of space around it.
  • Step 3: Ensure your soil has plenty of organic material. If additional nourishment is needed, apply compost, manure, or blood and bone.
  • Step 4: Excavate a hole that has the same depth as your potted vine but twice as wide. Place the plant inside the hole and refill with dirt. Create a circular mound of earth about 20 cm out from the stem’s base (this will help retain moisture near the plant for an extended period).
  • Step 5: Watering Well. Ensure the soil remains damp around the roots for several weeks following planting to aid the vine’s establishment.
  • Step 6: Place an organic mulch layer around the bottom of your passionfruit vine.

Passionfruit vine problems

Not fruiting

A frequent grievance among passionfruit farmers is the absence of fruit yield. Several elements might be at fault; however, inadequate pollination is typically the primary issue.

The crucial activities of bees may be affected by alterations in weather conditions like persistent, heavy rainfall and varying temperatures. Additionally, applying too much fertilizer could lead to excessive growth in your vines but result in a lack of blooms and fruits.

Fruit dropping

If your passionfruit plant is producing fruits but they're falling from the vines, this might be because of inconsistent watering, fungal infections, or infestations of fruit flies.

Yellow leaves

Wondering why your The passionfruit leaves are turning yellow. The primary reason often cited is the woodiness virus; however, it might also stem from a lack of magnesium or nitrogen, or possibly "winter yellows" induced by chilly, blustery conditions.

Spots

If you're seeing spots on your vines' leaves and fruits, they are probably caused by fungi like Alternaria spot or Brown Spot disease.

Do you require having two passionfruit plants to yield fruits?

No, you don’t absolutely require two passionfruit plants to yield fruits. These plants typically have the ability to fertilize themselves, so one tree alone can generate produce. Nonetheless, possessing several trees might boost the likelihood of effective fertilization and could lead to greater quantities of fruit.

If you have limited space or resources, you can still grow a single passionfruit tree and expect it to produce fruit.

The post How to grow passionfruit appeared first on Better Homes and Gardens .

Rare Corpse Flower Poised to Bloom: A Fleeting 24-Hour Spectacle at Garden Centre


categories: , , , ,

The strong smell of decaying meat is expected to permeate the atmosphere at a Melbourne At the garden center this evening, much to the joy of numerous plant lovers who are either planning to attend in person or watch online.

The Titan Arum plant, often referred to as the "corpse flower," is expected to possibly come into bloom at Collector’s Corner Garden World in the Braeside area this evening.

The scarce plant known as Tiny the Titan is set to be the third one to flower. Victoria In just six months during what typically would be a once-in-a-decade occurrence.

READ MORE: Canada and the European Union hit back at Trump by targeting beef, whiskey, and motorcycles.

The bud is expected to partially close tomorrow morning and be 90 per cent closed by the end of the day.

Staff stated on social media that they will keep a close watch on Tiny today, anticipating this is the day.

The event has turned into must-see television for enthusiasts of the flower, with a Livestream capturing each subtle movement.

EXPLAINED: To what extent will Trump's tariffs impact the Australian economy?

Past guests at the garden center have described the odor as similar to "a dumpster filled with decaying fish" and "a dead opossum."

"You must experience it firsthand to form your own idea of what the scent truly is like," Collector’s Corner Garden World owner Jeno Kapitany told 9News earlier.

Back in January, Many individuals assembled at Collectors Corner Garden World. to catch a whiff of the pungent bloom and snap pictures of this unusual spectacle.

READ MORE: Every billionaire who has seen their wealth decrease due to backing Donald Trump

Months before, the corpse flower made a highly anticipated debut at the Geelong Botanic Gardens within the city of Geelong.

A second Titan Arum bloom occurred at the Braeside garden centre in 2016.

The Botanical Gardens in New South Wales hosted their own event for witnessing thecorpse flower blooming. Sydney .

The plant, which was dubbed "Putricia" by fans It was visited by hundreds of people in January.

DOWNLOAD THE 9NEWS APP Stay updated with the newest developments in breaking news, sports, politics, and weather through our news application, and receive alerts directly on your smartphone. Download it now from the store. Apple App Store and Google Play .

How to Grow Juicy Strawberries at Home in Australia

Strawberries or Fragaria Are among the most favored and tasty fruits in Australia. As strawberry season approaches, this is an ideal moment to sow strawberry seeds or plant young saplings and attempt growing your own!

Filled with nutrients and an incredible supplier of antioxidants Strawberries are a common favorite in numerous Australian homes during the warmer seasons. Let's explore together the top choices for cultivating strawberries at home.

How to grow strawberries

It might astonish you to know that cultivating your own strawberries is surprisingly simpler than you imagine. The primary fact about the strawberry plant is that it belongs to the rose family. This indicates that strawberries are not truly berries or fruits at all. Rather, they are The extended Stamens, along with the black seeds inside strawberries, actually constitute what we refer to as the 'fruit'.

Below is all the information required for cultivating your very own strawberry plants.

Strawberry varieties

Several kinds of strawberries grow in Australia. Among them, some of the most favored types include:

  • Millewa
  • Lowanna
  • Kiewa
  • Kalinda
  • Bunyarra
  • Adina
  • Tallara
  • Festival
  • Rubygem

Ways to Look After Strawberries

Climate

Although strawberries can be cultivated across all regions of Australia, the majority of large-scale strawberry farms are located in areas with milder climates such as Toolangi, Stanthorpe, and Tasmania. The ideal season for planting strawberries is during autumn and early spring.

Aspect

To ensure your strawberries thrive, grow them in a location where they receive ample sunlight and have access to damp yet well-aerated soil. It’s suggested by some specialists to utilize straw mulch or manure as this can aid in retaining moisture and keeping insects at bay!

Soil

Well-draineSoild and slightly acidic.

Water

Maintain dampness of soil. Ensure watering is directed at the soil rather than the foliage.

Food

Applied weekly using liquid fertilizer to encourage foliage expansion, robust root formation, and an abundance of tasty fruits.

Mulch

Use an organic mulch like sugarcane or lucerne to cover the soil or growing medium.

Disease

It's crucial to ensure the fruit isn't touching the ground since exposure to moisture can be detrimental. And keeping the soil consistently damp for an extended period can lead to fungal issues like grey mold. or fruit rot.

How to plant strawberries

Strawberries are adaptable and can be cultivated using various methods.

Strawberries produce high-quality fruit during the initial 1-2 years. After this period, they yield considerably fewer berries over the next 5-6 years until eventually ceasing production altogether. Due to this cycle, numerous commercial farmers opt to replant strawberries biannually. An established and healthy strawberry plant generates runners that establish roots and develop into new plants independently.

How to propagate strawberries

Absolutely! You can propagate your strawberry plants at no cost. These plants produce runners—side shoots—that develop their own root systems to create new specimens. However, these runners require substantial energy, which could detract from fruit yield during the initial two years. Thus, it's best to remove them until the third year when you can utilize the small rooted nodes along the runners as starter plants. Anchor these nascent roots using a hairpin or wire. About six weeks later, detach this offspring plant from its mother; then either let it continue growing in place or transplant it elsewhere.

The most effective method for cultivating strawberries

Although you have the option of buying strawberry seeds, the simplest method to cultivate strawberries is to begin with young plants, known as seedlings, available for sale at your nearby nursery.

There are six methods for cultivating strawberries.

1. In the ground

Historically, cultivating strawberries directly in soil has been the preferred method. Just buy one or two young plants and space them about 30 centimeters apart when planting them in your garden bed.

2. Raised garden beds

The strategy mentioned previously also applies here. raised garden beds .

3. Hanging pots

Hanging strawberry planters offer an entertaining and inventive solution for those with limited space to relish fresh strawberries right at home. These hanging containers typically boast excellent drainage, much to the delight of your strawberry plants.

4. Terracotta pots

Certainly, you can cultivate strawberries in containers. The sight of vibrant green strawberry leaves against terra-cotta pots is quite appealing. However, do keep certain precautions in mind. terracotta strawberry pots In the scorching Australian weather, terracotta surfaces can become extremely hot and may singe both the fruits and foliage.

5. Vertical garden

Another excellent choice for urban dwelling is a vertical garden Similar to tomatoes, strawberries possess robust stems, making them a perfect choice for your vertical garden.

6. Pipe

Cultivating strawberries inside a PVC pipe is both feasible and visually appealing when executed correctly. The primary methods for growing strawberries in these tubes include cutting several circular openings in the pipe or slicing the tube longitudinally so they can extend fully along its length.

How to harvest strawberries

Now that you've put in the effort, you might be curious about how long it takes for strawberries to mature. Here are some indicators to watch for: Initially, your strawberry plants will begin blooming between 8 to 16 weeks post-planting, followed by ripe berries appearing approximately 4 to 6 weeks later when blossoms emerge. Distinct from numerous other fruits, harvested strawberries cannot enhance their ripeness; hence ensure they're vividly red and succulent before picking them.

Pests that love strawberries

Strawberries aren't just a favorite for us; tiny creatures like them as well! From two-spotted mites to worms, slugs, and even possums, these organisms enjoy them too! garden pests Love strawberries for their fruity goodness, yet they also relish eating the plant's vibrant green foliage.

Ways to deter birds from your strawberries

It's likely that you won't be the only one eyeing those luscious berries. Cover your strawberry patch with bird netting to protect them from avian visitors and boost your harvest. Another approach is as follows: prevent birds from feasting on your fruit without causing harm to them .

Top plant partners for strawberries

Onion and garlic serve as excellent companion plants for strawberries because their potent aromas help deter pests.

Thyme: works well as an edge for strawberries since it keeps the worms away.

Leafy greens: numerous specialists think that planting lettuce , combining spinach and strawberries boosts the efficiency of all three!

After cultivating your strawberries, the subsequent step is to figure out how to utilize them! Will you consume them directly from the plants, or incorporate them into delectable treats? Take a look at 19 of our top picks for delicious strawberry recipes ideal for the spring weather.

The post Ways to cultivate strawberries at your residence appeared first on Better Homes and Gardens .

행잉 플랜트 완벽 가이드 ②


categories: , , , ,

행잉 플랜트에 적합한 식물은

현재 행잉 플랜트 시장이 정점을 이룬 상태에서는, 바쁘거나 관리하기 어려운 환경에도 견딜 수 있는 식물을 찾는 사람들이 늘고 있습니다. 대표적으로는 물과 햇빛이 약간만 있어도 잘 자라는 착색선인장이나 다육식물입니다. 국산 행잉 플랜트 중 최초로 알려진 아이비가 이제 그 독주를 멈춘 것은 실내에서 재배하기 좋은 조건 때문에 많은 양의 물을 요하며 빠르게 성장하는 덩굴성 식물이었기 때문입니다. 오늘날 우리 나라의 일반적인 거처들은 상 subtropical 과 건조한 날씨 특성을 가지고 있으며, 이러한 조건에는 큰 잎으로 보호받으며 물 소모량이 작은 다육식물 또는 선인장 같은 식물들이 더욱 적합합니다. 이런 식물들 역시 행잉 플랜트로서 각광 받고 있습니다.

립살리스


원산지는 건조한 기후 지역인 리톱실레스(Lithops)는 열대우림과 같이 덜 건조하고 온화한 아열대 지역에서도 잘 정착하며 다양한 형태를 보여줍니다. 이plants는 최근에 많이 인기가 있는 hanging plants(행잉 플랜트) 중 하나입니다. 그들은 고유의 특성 때문에 '갈대 선인장'이라는 별명까지 얻었습니다.
립살리스에는 여러 가지 변종들이 있는데, 예를 들어 Schizocephala Punctata, Floccosa Tricolor, Triangulare, Pink 및 White 등의 유형이 있습니다. 이러한 변화된 모습은 동일한 Lithops species라도 서로 다른 컬러 패턴이나 모양을 가짐으로써 plant space를 더욱 다채롭게 만들어줍니다.
Lippsalis의 주요 장점을 들자면, 유지보수하기 쉽습니다. 물 공급량을 너무 신경 쓰거나 성장을 위해 일정 시간동안 광합성을 해야하는 번거로움이 없습니다. 일반적으로 우리는 식물을 원하면 대개 매우 건조하거나 특정 조건을 요구하지만, Lippslis는 삶의 방식 자체를 바꾸었으며, 그것은 일부 칼라포타 부류와 비슷합니다: Hatiora, Rhipsalidopsis, Epiphyllum 그리고 Dischidia 등등도 이런 category 안에 포함됩니다.

호야

다육질 식물인 립살리스처럼 종류마다 처진 잎모양이 달라 행잉 플랜트로서 사랑받습니다. 이들 식물은 아름다운 잎뿐만 아니라 적절한 환경에서 작고 별같은 꽃을 피우므로 30대 후반이나 40~50대 여성이 특히 선호합니다. 호야 로시타와 룩타오라는 타원형 잎에 밝게 대비되는 경계선으로 알려져 있으며, 리본 호야는 줄기의 모습이 여러 리본을 묶었듯이 무늬롭게 늘어서 있어서 주목됩니다. 얇고 긴 잎들이 서로 감겨 있는 것으로 '호야 스파이더'라고 부르기도 하는 호야 레투사는 단순하면서도 세련된 느낌을 제공합니다. 호야는 잘 자랄 수 있도록 충분히 햇빛을 받지만 건조에도 강하므로 표토층이 완전히 마를 때까지 물주기를 합니다. 다양한 모양과 색상 때문에 어둡거나 음울하게 느껴질 수도 있는 립살리스와 같이 배치하면 더욱 독특하고 조화로운 분위기를 연출할 수 있습니다.

틸란드시아

아이비 이후로 식물을 좋아하는 사람들은 주렁주렁 걸린 형태의 핸딩 플랜트 종류에 큰 관심을 보였다. 그 중에서도 낱낱이 퍼져 나오는 것 같지만 안개처럼 부드럽게 생긴 에피포팀 Tillandsia(티ланд시아)는 사람들에게 강력하게 어필하였다. 하지만 이 식물은 다루기에 어렵고, 섬세하고 은색 줄기 같은 잎맥에 혹해 쉽게 실패하게 되기도 하는데, 이것은 많이 발생하는 일입니다. 계절마다 빛과 습도 그리고 온도를 조율하며, 겨울에는 더욱 신경써야 합니다. 또한 꽃이 필 때 모체가 죽으므로 증식 과정에서 문제가 자주 나타납니다. 이러한 업무상 복잡함에도 불구하고 외모만 보면 충분히 가치 있는 것으로 여겨질 수 있으니 각각의 종류별로 다른 유지 방법을 알고 들어와야 합니다. 동시에 잘 알려졌듯이 공기 정화 능력은 사실 매우 제한적이라는 것을 명심하세요.

박쥐란


박쥐란이라는 이름부터 독특하고 인상적인 이 식물은 따로 화분에 의존하지 않고서도 단독으로 멋진 디스플레이 역할을 한다. 눈길을 끄는 모습과 함께 어느 다른 식물보다 트렌디함에 예민하면서도, 동시에 일부 재배 경험이 있는 사람조차 생소하게 느껴져 종종 잘못된 방법으로 돌봐 결국 아쉬운 결과를 초래한다. 만약 당신이 우리의 거실에 매달리는 형태의 식물을 선택했다면, 박쥐란의 상당히 빠른 성장을 고려해볼 것을 권장한다. 또한 일반 실내 식물들보다 크기가 더 큰 점 역시 기억해야 할 부분이다.
동남아시아에서는 특히 이러한 식물을 쉽게 발견할 수 있으며, 대부분 대형 나무나 바위 위에 부착되어 살아가는 체류성 식물입니다. 이런 식물들은 자연 상태에서 공기 중의 습기를 이용하여 번창하는데, 그러한 환경을 모방해서 키우기는 어렵습니다. 더욱이 이를 적절하게 갱신하거나 새롭게 만들 때에도 문제가 발생하곤 합니다. 그래서 정교하게 관찰하며 잘 다루어야 하는데, 바로 이것이 박쥐란이 전문적으로 관리되는 경우 귀여움을 받고 있다는 증거입니다. 그러나 그럼에도 불구하고 많은 사람들이 매력적이라고 생각합니다.

원숭이꼬리 선인장

털이 부숭부숭한 긴 잎이 원숭이 꼬리와 똑 닮아 원숭이꼬리 선인장이라고 불린다. 박쥐란만큼 개성 있는 생김새로 실내에 독특한 분위기를 더한다. 많은 햇빛이 필요하므로 계속해서 해가 들어오는 자리에 걸어둔다. 충분한 빛을 제공하지 못하면 쥐꼬리처럼 가늘어지니 유의해야 한다.

아이비 & 스킨랩서스 & 에피페네럼

열대관엽식물 중 과거에는 주로 행잉 플랜트로서 큰 사랑을 받아왔다. 처음엔 바닥에 두었던 화분으로부터 시작해 줄기가 계속 늘어나며 천정 쪽으로 이동하였다. 이러한 방식으로 설치할 경우, 비단 같이 드리워진 가지들은 마치 자연의 신선함을 느끼게 하는 모습을 연출한다. 그러나 이런 종류의 식물을 직접적으로 보자면 그것들이 쉽게 자라는 것은 사실이나, 특히 국내와 같은 실내 중심의 가든 환경에서는 다소 어려운 면이 있다. 또한, 줄기는 최대 3-4미터까지 성장하며 특정 품종은 선명한 무늬를 가지고 있는데, 이를 위해서는 충분한 양의 빛이 필요하다. 따라서 꾸준히 조절과 재배가 요구된다. 만약 열대관엽식물로부터 진짜 인테리어 가치를 원한다면 적합하게 분갈이하고, 필요한 경우에는 줄기를 단순화시키거나 정돈해주어야 할 것이다.

플라워 가디닝 숍 '가든 파트너'에서 활약 중인 강세종 가드너가 소개합니다

hang 없는 '행잉 플랜트 관리 비법 3가지'

1 어디에 위치시킬까요? — 가능하면 최소한 반양지를 넘어서 곳을 찾아주세요.

사계절이 뚜렷한 우리나라에서 동남아 같은 아열대식물의 행잉 연출은 어려우나 그래도 차선책으로 찾자면 창가나 베란다가 최적의 장소다. 빛이 강한 곳에는 건조에 강한 선인장을 둔다. 그보다 조금 더 먼 곳에는 빛이 부족해도 잘 버티는 립살리스, 호야 등의 식물을 둔다. 그러나 립살리스 류는 밝을수록 건강하게 잘 자라므로 가능하면 반양지 이상의 장소에 둬야 한다. 간접광이 미치는 거실 안쪽에는 스킨답서스와 에피프레넘을 놓는다. 단, 창문에서 2m 이상 멀어지지 않도록 한다. 너무 어두운 곳에서 키우면 식물이 웃자란다. 자연 채광으로 충분하지 않은 집이라면 생장등은 훌륭한 해결책이다. 천장에 레일을 달아 LED 전구를 달아놓거나 스탠드형 생장등을 활용하면 인테리어 효과도 누릴 수 있다.

2 언제 물을 줘야 할까요? — 규칙적으로 주는 것은 피해야 합니다.

국내 행잉 플랜트 종으로 자리 잡은 립살리스, 호야 등은 착생식물 류의 선인장, 다육식물이다. 키가 큰 나무나 암석에 붙어 비정기적으로 내리는 빗물을 흡수하며 살아가도록 저장조직이 발달했기에 필요할 때만 물을 줘야 한다. 일반 식물들처럼 정기적인 물 주기는 금지다. 대부분의 착생식물이 건조에 강하기 때문에 바싹 말라 보이는 경우에도 몇 시간 물에 푹 담그면 언제 그랬냐는 듯 통통한 모습으로 돌아오는 걸 어렵지 않게 볼 수 있다. 착생선인장은 워낙 건조에 강해 2~3개월에 한 번만 물을 줘도 충분히 버틸 수 있다. 즉 식물이 물 부족 신호를 보낼 때 물을 준다. 잎이 쪼글쪼글하고 얇아지면 물을 채울 타이밍이라는 신호다. 립살리스는 1~2개월 물을 주지 않아도 잘 버틴다. 한 번 줄 때 싱크대나 화장실에서 물을 준 후 약 30분 후 남은 물을 따라낸다. 스킨답서스와 에피프레넘은 흙이 마른 것을 확인한 뒤에 물을 준다. 겨울철에는 난방으로 잎이 말라버릴 수 있으므로 습도가 40% 이하로 떨어지면 수시로 분무한다. 다육선인장의 일부 품종 중에는 무더운 여름이나 겨울에 휴면하는 종이 있다. 휴면기에는 물이 필요하지 않은 식물인지 구매할 때 확인한다.

3 성공적인 정원 가꾸는 방법은 무엇일까? — 식물을 이해하는 것이 중요합니다.

행잉 플랜트는 주로 식물 자체에 초점을 맞추므로, 더 많은 지식을 필요로 합니다. 이전에는 이러한 식물들에 대해 충분히 탐구하고 분석해야 하죠. 더욱 아름답거나 독특한 행잉 플랜트일수록 재배하기 어렵게 될 가능성이 큽니다. 따라서 그들의 성장속도, 요구되는 일량 및 물의 양 그리고 증식 방법 등에 대해서 철저히 파악하는 것이 중요합니다. 비슷한 종이라 해도 다양한 품종들이 있으며 각각 다른 보살핌 방식을 필요로 할 수도 있습니다. 결국 식물은 살아있는 존재이며, 마치 애완 동물을 기르듯 신중하게 고민하여 결정해야 함을 기억하세요. 맨 처음부터 외형이나 디자인만으로 쉽게 판단하지 않고요.

도움말 강세종 가드너 참고도서 , ,

How to Grow an Avocado Tree from Seed: Your Ultimate Step-by-Step Guide

The avocado is a hassle-free plant that demands minimal care and financial investment. This well-known plant serves various purposes including culinary uses, decorative arrangements, landscape design, and medicinal applications. Should you be curious about cultivating an avocado pit, adhere closely to the outlined instructions, and before long, you will enjoy a productive garden.

Cultivating an avocado tree from a seed can be both an enjoyable and fulfilling activity. Regardless of whether you're experienced in gardening or just starting out, this guide will demonstrate how to grow an avocado from a seed effortlessly.

How to Grow an Avocado Seed

Avocados are packed with nutrients and provide numerous health advantages, including improved digestion, reduced likelihood of depression, and protection against bone density loss. Often referred to as alligator pears or butterfruit, these fruits are rich in monounsaturated fats along with vital vitamins, making them an excellent addition to a balanced diet. Below are the instructions for growing your own avocado tree from a pit.

1. Get ready to plant some avocado pits

To cultivate an avocado seed, you can place it in a glass of water, a jar, or another transparent container. The initial step involves adequately preparing the seed after relishing your avocado. When consuming the fruit, gently extract the pit ensuring not to cut or harm it.

Mildly wash the seed or seeds with warm water to eliminate any remaining pulp. Handle them carefully so as not to damage the protective brown outer layer, which shields the seed during sprouting.

2. Germinate the avocado pits

There are different ways of sprouting an avocado seed as shown below.

The toothpick method

To grow an avocado pit using this technique, gather the necessary supplies: toothpicks, a glass or jar, and water based on how many pits you intend to cultivate. Ensure you have everything ready and then proceed with these straightforward instructions:

  1. Make sure the pointed tip of the avocado pit is facing upwards and the flatter side is directed downwards. This positioning is essential for proper germination.
  2. Gently place three toothpicks into the seed about midway around its body at a bit of an incline. These toothpicks function as supports, enabling the seed to hang effectively in water.
  3. Pour water into a glass or jar until it is filled, then insert the seed with its rounded end underwater and its tapered tip sticking out of the water.
  4. Lastly, place the glass in a location where it will receive warmth and indirect sunlight. It’s advisable to refresh the water every 2-3 days to avoid the development of mold and bacteria.
  5. Signs of life in the seed will appear between 14 to 28 days, following which you should allow sufficient additional time for proper germination.

The wet clothing method

The technique using wet clothes is quicker than the one with a toothpick; nonetheless, it requires more care as opposed to the toothpick approach. For this process, you’ll require a mature avocado, a paper towel or clean fabric, along with a plastic bag. Here’s how to proceed with germinating your avocado pit successfully.

  1. Loosely wrap the stripped avocado pit in a wet cloth or paper towel. Doing this helps keep steady moisture levels necessary for the seed to sprout. Additionally, it forms a moist atmosphere that promotes germination while shielding the seed from dehydration.
  2. Put it inside a sealed container or a plastic bag and store it in a warm location.
  3. Inspect the seed once or twice each week to make sure it remains in optimal condition.
  4. Change the wet cloth or paper towel periodically to maintain moisture and avoid mold growth.

Direct germination method

This technique entails allowing the avocado pit to sprout and then germinate right in the soil. There’s no need to move the sprouted seed from one location to another; instead, you'll watch the plant grow in its initial spot.

The supplies required for this course consist of an avocado pit, a sharp blade, water, and either a container suitable for planting or access to fertile ground. Below is the procedure for sprouting avocado pits directly in soil instead of using water.

  1. Select a container that has adequate draining holes and fill it with rich potting mix.
  2. Place the seed with the flat side downwards and ensure the pointed end is just slightly protruding above the soil surface.
  3. Thoroughly water the soil until it is damp yet not saturated. Position the container in a spot that receives ample sunlight and warmth.

Instead, you can locate the appropriate site using warmer soil and sow the seed directly into it. Ensure that the area is warm yet shielded from direct sunlight to facilitate successful germination.

Similar to the preceding techniques, within 14 to 28 days, the seed will start to grow, and you'll see a shoot poking through the earth. Maintaining steady dampness and heat throughout this period is essential.

3. Move the germinated seed into the soil

Once your avocado pit has begun to sprout, you'll need to get it ready for the next stage: germination. This step ensures that the initial growth develops into a fully grown plant.

Once your avocado seed has sprouted and developed roots approximately 3 inches in length, this procedure can begin. This guideline is suitable for individuals employing either the damp cloth technique or the toothpick method to encourage seed growth. Adhere to these instructions to ensure proper germination:

  1. After the root reaches approximately one inch using the damp cloth technique, move the sprout to a transparent glass, jar, or petite vase via the toothpick approach to observe the growth of the plant.
  2. If you're dealing with a container that has a narrow neck, such as a bottle, you can simply place the seed on top without requiring toothpicks.
  3. In about one to two weeks, the main root will extend into the water and could start forming secondary roots.
  4. In about another week, a stem will sprout from the top of the seed, soon followed by rapidly growing leaves. Throughout this phase, keep an eye on the water levels to make sure the roots remain underwater and aren’t exposed due to evaporation.
  5. Once the stem grows to around 30 centimeters, move the plant into a pot allowing it to access nutrients from the soil.
  6. Utilize a pot or container featuring adequate drainage holes and use a well-draining potting mixture.
  7. Put a layer of potting mix at the base of the pot, then center the seed inside. Ensure the upper part of the seed aligns with the edge of the container.
  8. Fill in with potting mix, pressing it gently around the roots, ensuring roughly one inch of the seed remains visible above the ground. Conclude by giving it ample watering post-planting.

4. Moving the sprouted seeds

If you reside in an equatorial region, you can move your avocado tree outside once it becomes robust and sizable. Pick a spot that receives ample sunlight and has good drainage. Excavate a pit somewhat bigger than the roots' mass and carefully set the sapling inside. Give it plenty of water initially and ensure consistent maintenance thereafter.

Advice for nurturing your avocado plant

Since your avocado seed has been sown, appropriate care is crucial for promoting robust development: The subsequent advice will assist you in nurturing this lucrative plant until it reaches full maturity.

  • Utilize precise scissors or clippers to trim the avocado stem just above a node, ensuring it remains about 15-20 cm high. Remember, nodes are spots from which leaves emerge, even those small ones scattered along the stem. Such trimming promotes a sturdier, more lush growth.
  • Position the plant where it will receive plenty of diffused light. The avocado plant flourishes best in such conditions. Don’t forget to turn the container periodically for uniform development.
  • Maintain evenly damp soil without allowing it to become saturated. To prevent root rot, ensure you water it frequently yet sparingly.
  • As your avocado plant continues to grow, it will require additional nourishment beyond what the potting soil provides. Hence, apply a well-balanced fertilizer periodically to supply necessary nutrients. During winter, you may omit feeding the plant since it enters a resting phase.

For how long should you soak an avocado pit prior to planting?

You may choose to submerge an avocado pit in water for 1 to 2 days prior to planting. Once done, removing the outer skin could accelerate the germination process.

What steps should one follow to cultivate an avocado plant from a pit?

You can cultivate an avocado plant from its seed utilizing three techniques: the toothpick method, the damp cloth technique, or straightforward germination. Each of these approaches guarantees proper sprouting and nurturing of the seed until it reaches full growth.

What is the duration required for growing an avocado tree?

It typically takes 3-5 years for avocado trees cultivated from seeds to bear fruit. Nevertheless, this timeframe may extend based on the specific growing conditions and the type of plant.

Final word

Mastering the art of growing an avocado tree from seed is both fulfilling and patient-testing. Adhere to these instructions for sprouting, germinating, and preparing it for planting, and before long, you will enjoy a flourishing avocado plant. Regardless of whether you cultivate it inside or outside, the experience of fostering your own avocado tree can be just as gratifying as harvesting the fruit itself.

.co.ke has also released a compilation of 10 non-flowering plants along with details on their reproduction methods. Ranging from ferns and mosses to impressive cedar trees and redwoods, explore the intriguing realm of flora that thrives without relying on flowers.

Continue reading to discover various kinds of non-flowering plants, encompassing those that propagate via seeds and spores, and delve into their distinctive reproduction techniques. Regardless of whether you are an avid botanist or just intrigued, this piece provides captivating perspectives on some of nature’s oldest flora species.